
Types of Measuring Tools – Equipment for Taking Measurements
This post may contain affiliate links. We may earn a small commission from purchases made through them, at no additional cost to you.
We all love things, don’t we? We love things that we can buy, things that we can sleep inside of, things that we can eat out of, and even things that we can use to keep other things inside of! These things are often geometric structures made of raw materials that we have harvested, processed, meticulously measured, and then cut to make all of the wonderful things we see and use in our everyday lives. Pretty wild that we can do that, right? We’re one of the few species on the face of the planet capable of using tools to make things, and we’ve even developed an entire industry around fabricating tools that help us make these things! This being said, let’s have a look at some of the precision types of measuring tools we can use to make all sorts of things, as well as how they work and how to use them!
Types of Measuring Tools
The tools we’ve made to create things are really cool, they allow us to measure angles, indents, depths, length, widths, heights, circumferences, endpoints, and even internal dimensions of all the things we love to make. The trades these instruments are typically used in are usually wood crafting and mechanical engineering, as well as motor mechanics. While some instruments are isolated to use specific trades, the majority of them are spread across multiple disciplines due to their versatility and similarities between these occupations. This being said, here are some of the most used measuring instruments categorized by the type of measurement they’ve been designed to express.
Linear Measuring Tools
As the name suggests, these tools are used to measure a given length, typically in a straight line. They’re actually really cool and allow you to make precise measurements where a simple ruler isn’t enough, although, if used correctly a ruler can be just as accurate as any other measuring tool. Let’s have a look at a few things you can use to get super accurate measurements of loads of things both in your workspace and around your home, shall we?

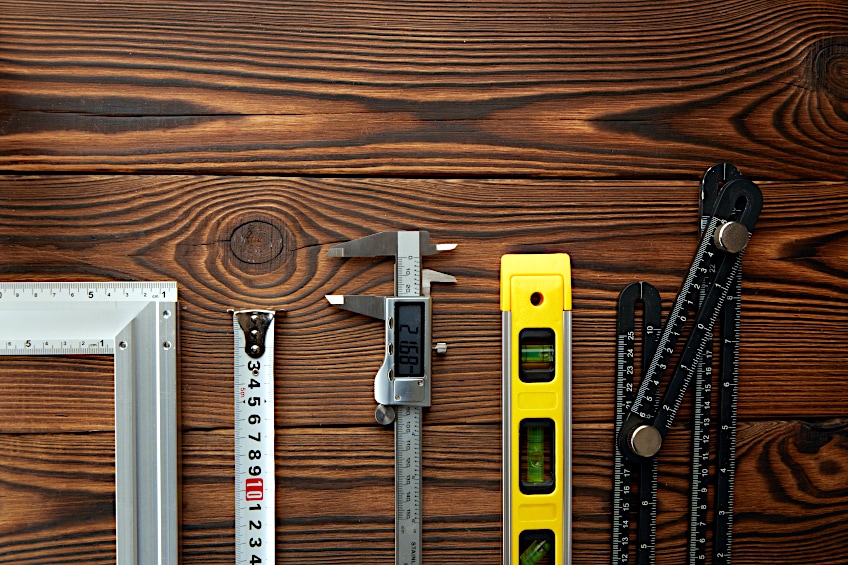
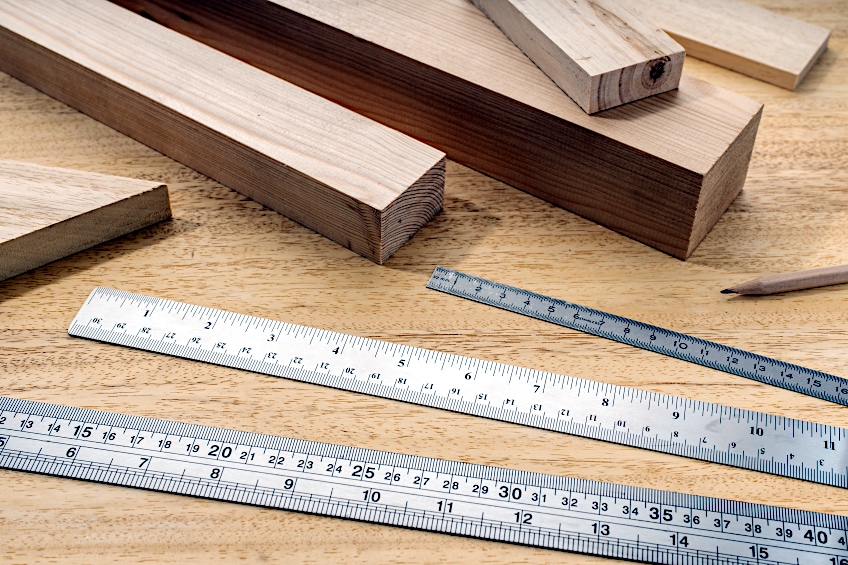
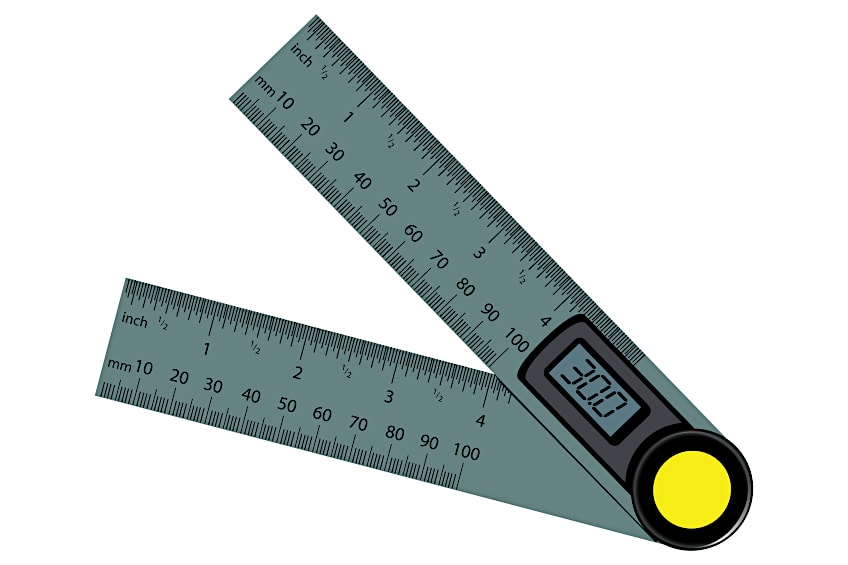
The Steel Ruler
If you’re friends with an engineering student or happen to be one yourself, then you know that this is something in the trade that they simply cannot go without. This item is used to measure scale or to inspect workpieces in both engineering and woodwork. It is typically used in combination with other instruments to get even more detailed measurements and expresses length in millimeters (mm) rather than centimeters (cm), feet (ft), or inches (in).
The Calipers (External and Internal)
Calipers look like weird little tweezers. They’re used in conjunction with a steel ruler to determine the length of an object or the space between two points in space. These are capable of getting more accurate measurements compared to a ruler due to the calibration of their little points. By placing the points on two points you’d like to measure between you can then lock them in place with a small screw.
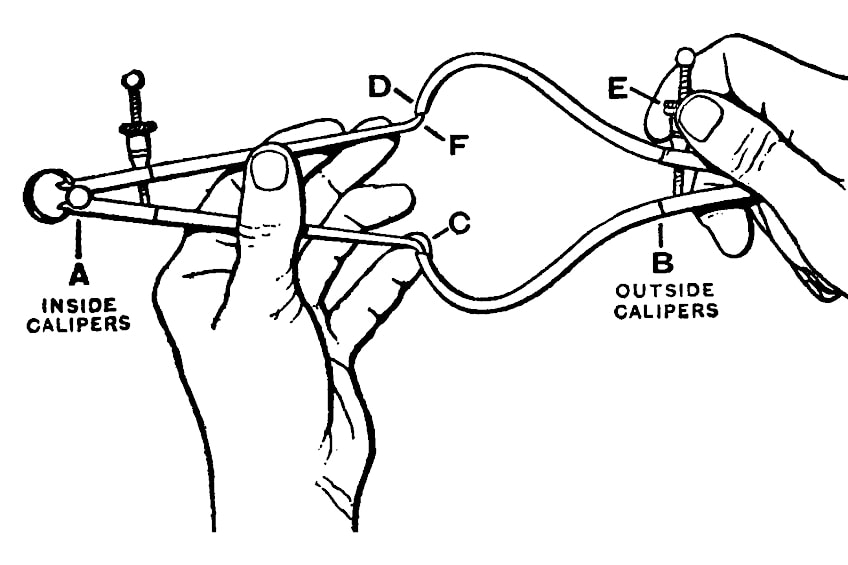
The locked calipers can then be placed against a steel ruler to get a rather accurate measurement of the length in question. Both internal and external calipers exist to measure their corresponding dimensions and are typically used when creating intricate workpieces.
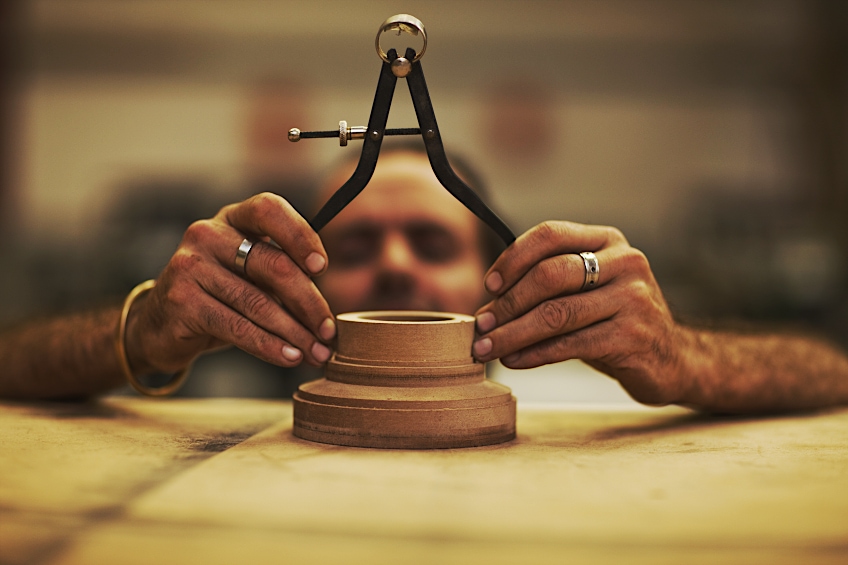
The Telescopic Gauge
The telescopic gauge really has come a long way and has improved the lives of both wood crafters and engineers all over the world. This tool is used to determine the internal circumference of objects or to simply measure the internal distance between two points. How does this work? Well, the tool is t-shaped, with the smaller arms being retractable to compress themselves to fit into gaps.

Once the gap has been filled by these arms, they can be locked and then measured against a steel ruler to get an accurate measurement just like when using calipers. Really high-end telescopic gauges have a little screen on them that gives you a read-out about the distance in the measurement of your choice, which is great for the sake of convenience or if you’re working on a time-sensitive project.
The Depth Gauge
Different measuring tools are used for different applications, and while most of us consider length to be how long something is or the measurement of a space something fills, it can mean the depth of an object or space too. This is where a depth gauge comes into play, it can be used to see how deep a recess is, or in the case of real-life applications, it can be used to see how far down a pipe goes.
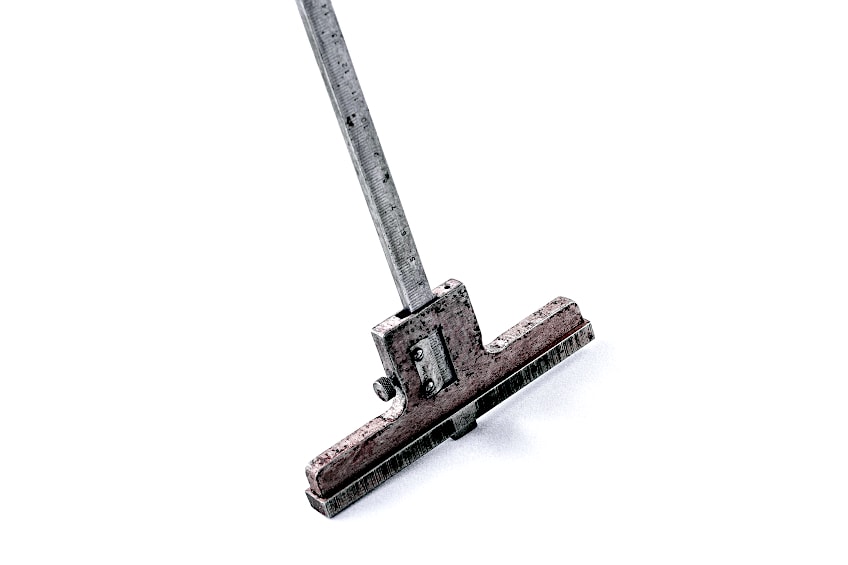
A depth is essentially a ruler capable of extension and retraction. It also has two flanges on one end to act as stoppers while the ruler part extends into the recess below. Once the depth has been measured the ruler mechanism can then be locked in place to save the measurement of the recess. This is a really useful tool and is used in a number of disciplines, in fact, these types of measuring tools are often found in laboratory environments.
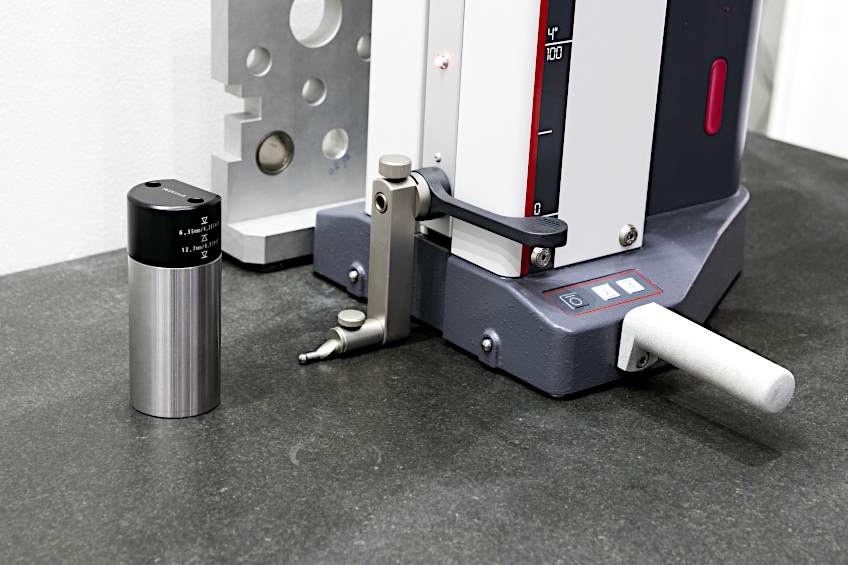
The Micrometer
As we mentioned previously different measuring tools exist for different applications, but they also exist to provide a varying level of precision for the user. You see, while the steel ruler provides measurements accurate to within 0.1 of an mm. the micrometer provides measurements within 0.01 of the targeted measurement. This means that it is far more accurate than most other measuring instruments.
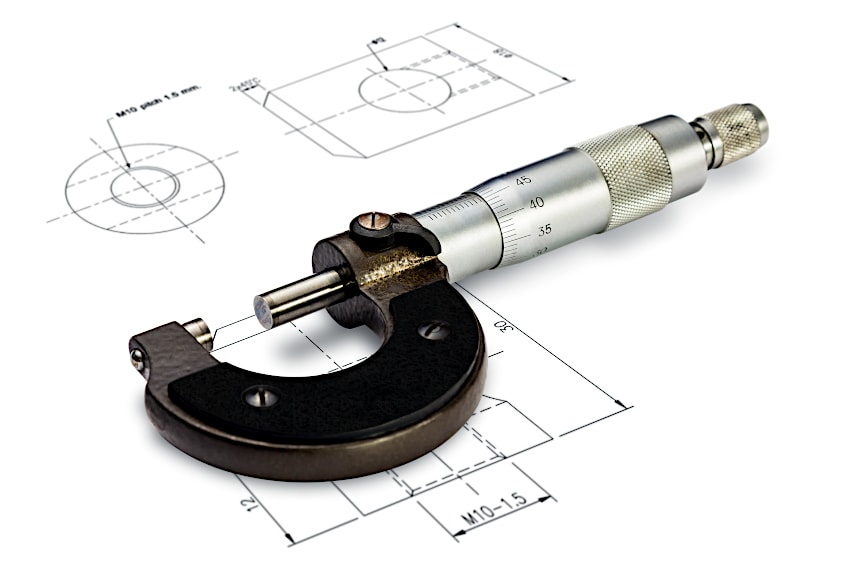
Micrometers resemble a C-shaped clamp with a barrel which allows the clamp to be extended and retracted to meet the shape of the object being measured. What is this instrument used for? Well, micrometers are often used in metallurgy and mechanical engineering to get extremely precise measurements of surfaces and internal components of machinery. These types of measuring tools need to be constantly maintained to ensure the most accurate read out at all times.
The Vernier
A vernier caliper is one of the most commonly used precision measuring instruments around. Think of it as a combination between a really accurate steel ruler and a set of calipers. While the one caliper remains static the other one can move along the length of the ruler using a sliding mechanism. This caliper can then be used to measure the external dimensions of an object, or if the opposite end of the caliper is used, the internal diameter of a workpiece.
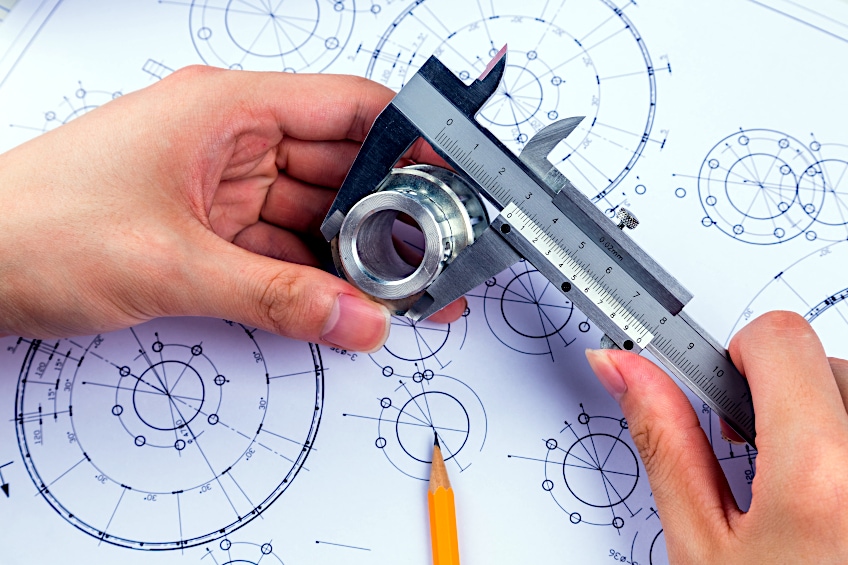
Where are verniers used? There are more than a few places and occupations where verniers are used, and basically for the same thing too. They’re used to get really accurate measurements quickly, which means they’re pretty versatile tools even if you’re just a weekend DIY warrior. If you have bad eyesight, there are verniers that display measurements digitally too!

The Height Gauge Vernier
As far as useful hand tools for measuring go this one is probably the most common in manufacturing and research fields. This device can be used to determine the external dimensions of a workpiece but is usually just used to determine the height of a given object. This tool also possesses a scribe which can be used to mark a particular spot on a metal or wooden workpiece.
This too essentially looks like a vernier that has been fixed in the upright position. The flange can also be locked in place until you’ve had a chance to record your measurements. The flange itself can also be used to extend across the surface of the workpiece you’re measuring if you’d like to make a marking further along the surface. This instrument also comes in the analog and digital varieties.
The Comparator
While it might be a bit of a stretch to put this device in the category devoted to hand tools for measuring because it isn’t really managed with your hands, and you can’t really carry it around either. This being said, this is used to measure two objects simultaneously and lets you know the difference between the two instead of a metric of each.
Comparators are pretty cool because they allow you to set a baseline measurement or “master” against which you can then measure another object. Where would you use something like this? Well in the case of crankshafts or other components which undergo wear over time, this is a good way to check the amount of wear an object has taken on over time.
The Slip Gauges
This is a bit of a weird one as it’s not really one of those measuring tools for length, but rather can be used to calibrate other measuring tools for really precise measurements. How is this done? Well, slip gauges are little metal blocks that have been measured and cut to extreme degrees of accuracy and are therefore good tools to use to set a baseline for other measuring tools for length.
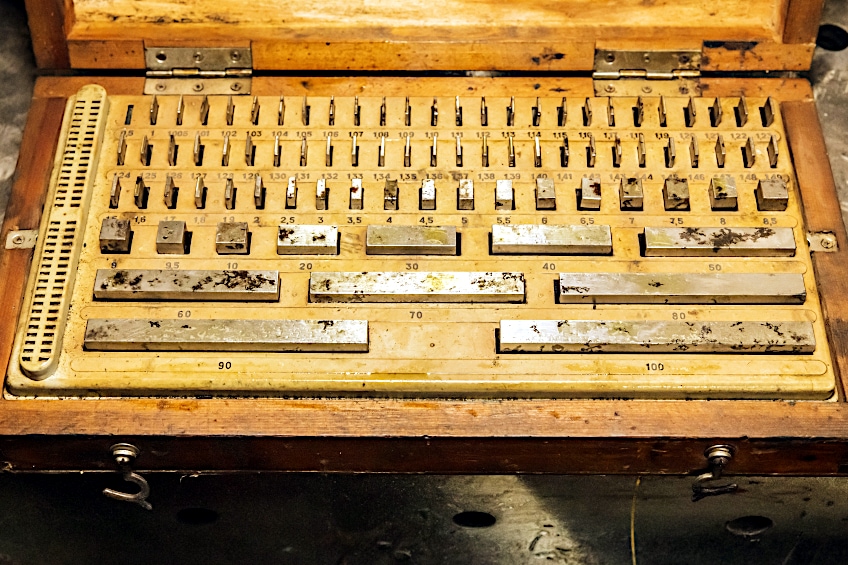
That being said, which tools can you use slip gauges to calibrate? Well, you could use it to set up a vernier, micrometer, comparator, and even a height gauge. Simply take a slip gauge and place it into the measuring tool and then lock the measurement in place. Remove the slip gauge and use the space left behind to measure objects you suspect are or would like to be the same length, height, or depth.
Tools for Measuring Angles
Sometimes measuring a straight line isn’t all you need, and if you’re looking to measure a gradient then what you really need is an angular measuring tool. Like the linear measuring tools these are most commonly used in the woodworking and engineering trades due to the nature of the work they do, but they can be found in the contracting trade too. This being said, let’s have a look at some of the common tools you can use to measure angles.
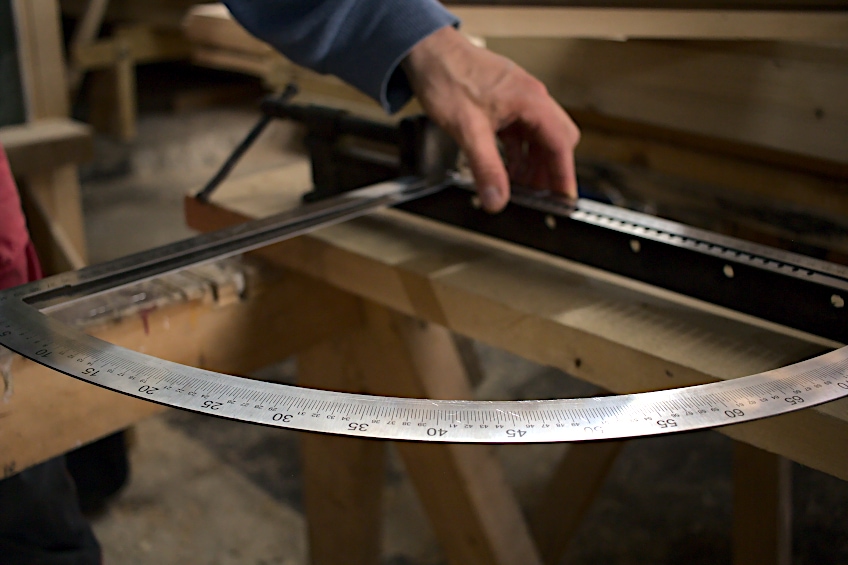
The Bevel Gauge
A bevel gauge is one of the useful tools to have around whether you’re in the woodwork trade or not. It’s used to measure and fix angles which can then be used to repeat a given angle over and over again. This is useful in the construction industry too when wood needs to be cut on-site, or in the engineering industry when you need to know the angle of a workpiece.
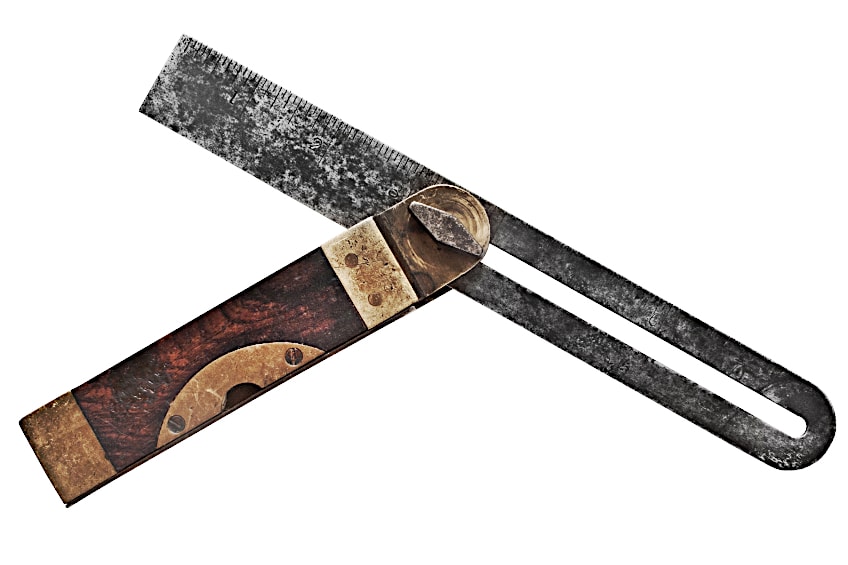
Although these tools don’t have any measurements on them, they can be used in combination with an angle square to find the angle you have used your bevel gauge to measure. Once you’re sure about the angle you have measured it can be replicated by locking the position of the bevel gauge in place.
It’s really accurate and is typically used to investigate the dimensions of workpieces or to find and adjust certain angles or gradients. These types of measuring tools are highly specialized and therefore it goes without saying that one needs to have adequate practice and experience when using them.
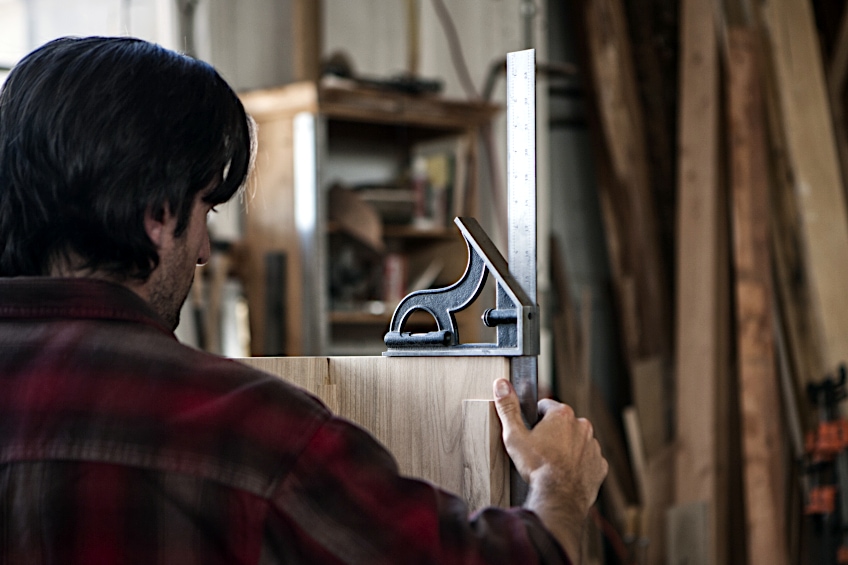
The Engineer’s Square
If you couldn’t tell by the name of this workpiece, it’s primarily used by engineers to see if a workpiece is square or not. It can also be used to draw lines or measure the length or depth of a square object. It isn’t limited to use in engineering either, it can be used in the woodworking craft for the same application as it is in engineering.
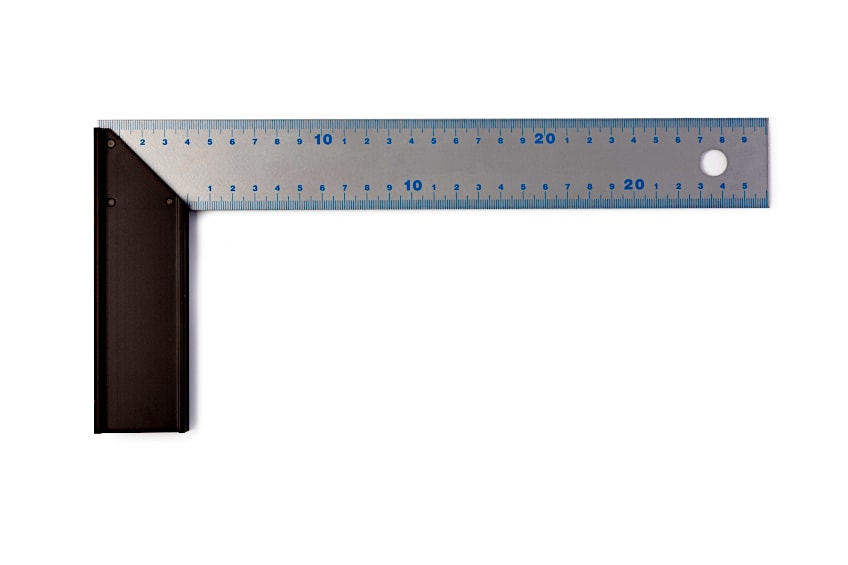
The square is typically used in combination with marking ink, typically called engineering blue to mark metal workpieces and assess the internal and external square of a workpiece. The workpiece is then typically cut using the markings that have been made, but it can simply be used to check the workpiece much like the bevel gauge is.
The Protractor Bevel Gauge
As the name suggests this instrument is a combination of a bevel gauge and protractor and pretty much works in the way you would expect it to. Instead of having to get a protector to use in combination with your bevel gauge, this tool allows you to both find the angle and provides an accurate reading using one convenient tool.
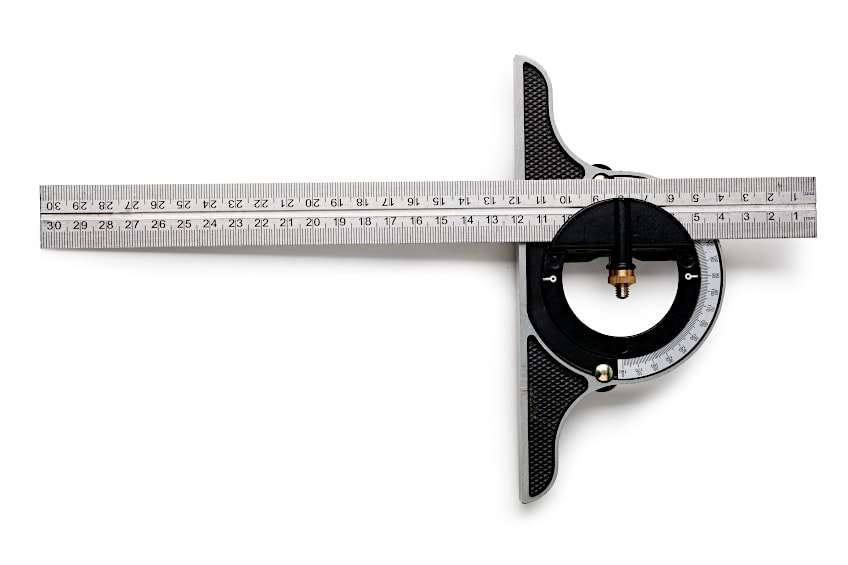
How do you use this tool? All that you need to do is like the object up with the static edge and then move the working edge until it is in contact with the other end of the object. Once you have the reading, use the screw mechanism to lock the measured angle in place, and then subtract the measurement you have found from 180 degrees to find the angle you need.
The Angle Gauge
The angle gauge is a lot like another instrument we covered previously called the slip gauge. Instead of measuring the gap between two points, you use the angle gauge, in the same way, combining different steel blocks in order to determine the angle the workpiece is standing at or a gradient on the workpiece itself. Although it isn’t used very often, it’s quite useful in getting really precise measurements.
As we mentioned previously instead of measuring the space between two edges it measures the angle between two edges using pretty much the same methodology. This is typically used in mass production or quality assurance to ensure that the workpiece is at the correct angle in a quick and effective manner.
The Combination Square
The combination square is a bit of an all-in-one tool that is primarily used in engineering but can also be used in woodworking, especially if joint and strut designs are something that you do often. Essentially, this is a ruler with a protractor, square head, and center head on it that can be slid up and down the length of the ruler and locked in place to save the angle you have measured.
While it’s really cool to have all of these tools in one place, they can’t be adjusted much and are therefore typically used to check or achieve 45-degree angles. These angles can then be marked and replicated using the locking mechanism or adjusted to your preference. Although convenient, this tool isn’t the most versatile due to its bulky nature.
The Spirit Level
Even if you’ve never done engineering or woodwork before, the chances are that you’ve seen this instrument lying around your parent’s garage or on television along with the stereotypical depiction of a construction worker. This tool is pretty simple and is usually used to determine an exact angle like 45 degrees or 90 degrees depending on the type of level you’ve got your hands on.

Speaking of which, there are loads of types of spirit levels out there. There are bull’s eye spirit levels that are used to ensure camera equipment is flush with the surface they rest on, there are ones that measure 45-degree angles, and even ones that can be used to measure the elevation of a surface if that’s what you need.
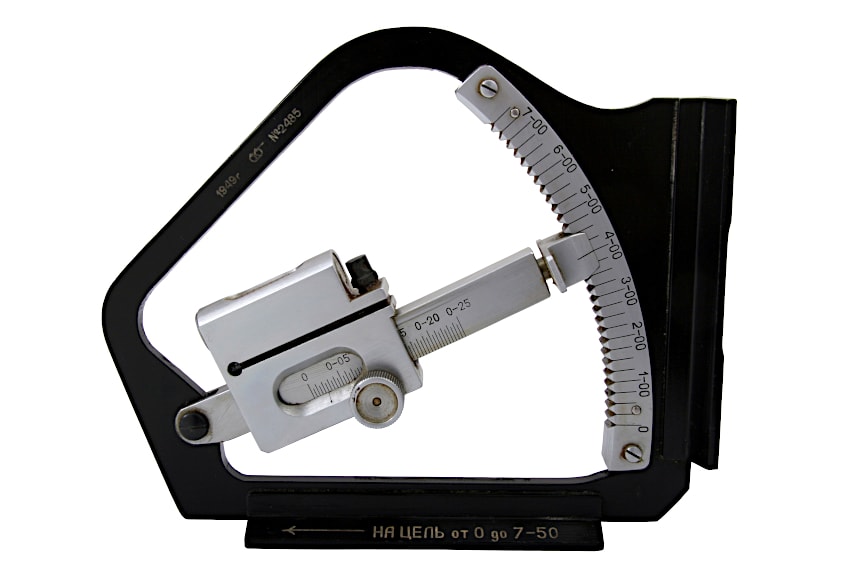
The Sine Bar
A sine bar is a bit more complicated to use due to it being designed to measure and achieve extremely precise angles within 1000th of a degree. This tool is often used in combination with slip gauges to ensure that the angle you’re hoping to get is completely accurate with little to no margin of error. This tool consists of a rectangular form with two cylinders at the end. These cylinders will move if there is any change in elevation of any of them, automatically changing the measurement you get.
The sine bar is typically used in combination with a dial test indicator (DTI) to draw lines that are completely level or exactly at the angle you’re trying to achieve using the sine bar. Usually, you would use the measurement from the slip gauges in combination with the SIN equation to find out the measurement of the gradient, which can then be further detailed using the DTI.
The Clinometer
A clinometer is a simple tool and, with a little know-how, it can be used to determine the elevation and slope of a workpiece. All it’s really made of is a shaft with a protractor attached to it, and a string is attached to the center of a protractor, with the weight attached to a string. Now, you might be asking yourself how you use this stone-age technology.
Well, all you need to do is establish a known distance between yourself and the workpiece you’re looking to measure. Once you’ve done this, bring the clinometer up to eye level and let the weight drop and establish itself at an angle. Lock this angle in place using the mechanism and subtract the measured angle from 90 degrees to find the gradient.
Tools for Measuring Tapers
Tapers and gradients are pretty much the same things; in theory, only while a gradient is a gradual incline or decline of a surface, a taper is defined as a uniform change in the diameter of a workpiece. Think of it as a gradient of a cylindrical form, like a birthday party hat that starts off as a flat cylinder and tapers toward a sharp point. Now let’s look at some tools you can use to measure this taper.

The Straightedge
A straightedge, put simply, is a ruler with a bevel on the measuring end (the side with all the numbers). This tool is essentially used to determine the straightness of a surface, and since it has a beveled edge, it can be placed right up against a workpiece; the taper of the workpiece can then be established (if there indeed is one).

This is a fairly rudimentary way for you to check the taper of a surface and does not allow you to check the exact angle of the taper at all. It can, however, be used in combination with other instruments to get an exact idea of what the taper is of a given object. There are more precise instruments for checking this.
The Surface Gauge
A surface gauge is essentially an indicator attached to a level base that can be calibrated with a ruler to hold the distance. This means that once a distance (or circumference) has been established the object can be rotated with the surface gauge in contact with it to determine the measurement of the taper the object has.

A surface gauge can be used in combination with a ruler to get a pretty good measurement of the taper of the workpiece. However, if you’re looking to get a really accurate measurement of the workpiece you can use a DTI or clock gauge as it is sometimes called to get an even more accurate measurement of the taper of an object, or lack thereof.
The Optical Flat
The optical flat is pretty much the easiest way to check if there are any indecencies with the workpiece. How does it work? Well, these are usually designed to be completely flat or flush with the surface they have been placed on, so when a light (hence optical flat) is shined on the instrument it creates interference which can be interpreted to determine the taper of a workpiece.
You will have to learn how to interpret the different disruptions in the light wave to determine whether you are dealing with a perfectly flat surface or one that has been tapered though. Usually, a flush surface is depicted with straight lines which have equal spaces between them. Other patterns indicate an uneven surface.
Now that you know what measuring tools are available to you, which tools you can use to measure a straight line, which tools you can use to measure angles, and which tools you can use to measure tapers, it’s time for you to get out there and put your new-found knowledge to the test. Remember to always work accurately and to ensure that all of your instruments are properly calibrated before you begin working.
Frequently Asked Questions
What Can You Use a DTI Gauge For?
A dial test indicator or a clock gauge can be used for a number of applications. Primarily it is used to align things or to measure things, particularly in engineering. There are also different types of dial test indicators available for different applications and professions.
What Do You Use to Measure Air Temperature?
While you can use electronic devices, thermometers were used before these became readily available. While older versions of this device used to contain mercury (due to how it expands under heat) modern analog thermometers use alcohol which achieves the same thing without being as potentially harmful as the latter.
What Do You Use to Measure Mass?
While mass might seem like a very scientific principle (which it is), mass and density are basically the same things, or at least closely related to one another. Therefore, mass can be measured using a balance scale, or a bathroom scale as we would use in our bathrooms or local gym.